


The Basics of Beat Detective: Best Practices for Editing Drums
Pro Tool’s Beat Detective is a powerful tool to have under your belt. From editing audio and MIDI tracks, to generating complete tempo maps and groove templates based on a performance, Beat Detective can be a real life and time saver.
Contrary to popular belief, the results need not be robotic or unnatural. When used properly, you can add a ton of consistency and weight to any drum or percussion performance without compromising an ounce of groove and feeling.
In this two-part series, we’ll take you from the very basic aspects of Beat Detective to some advanced workflows and strategies to use in busy and demanding studio situations.
Profile of the Detective
Beat Detective is found under the menu “Event”, or more quickly, using the shortcut Cmd+8 on a Mac or Ctrl+8 on a Windows-based machine, using the numeric pad.
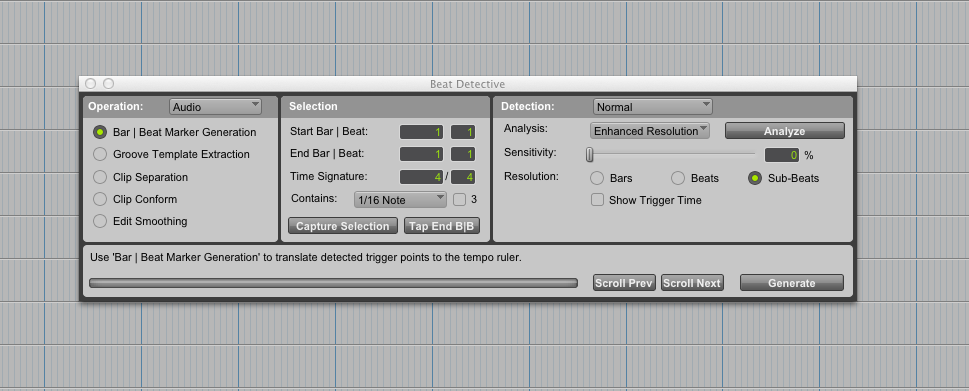
From left to right, the three main ares of the Beat Detective window are Operation, Selection and Detection.
The main window is divided into three areas: Operation, Selection and Detection. Depending on the operating mode selected, some of the fields under other sections will vary.
Don’t let all the options you’ll see here intimidate you. Beat Detective can be a powerful and complex tool, but once you understand what these controls do, it’s fairly straightforward to edit given performance, or use it as a groove reference in editing others.
Operating Modes
Conforming a drum track to the grid is probably the best-known use of Beat Detective (this is operation mode #3, discussed below), but that’s not all it can do.
Imagine you just recorded a killer drum take, with the perfect groove and feeling, and now you’d like to combine it with some loops and MIDI tracks to enhance your rhythm arrangement.
If you want to preserve the exact timing and feeling of the drums, you need to accommodate the grid around the drum tracks, and that’s precisely what the first operation mode “Bar | Beat Marker Generation” allows you to do.
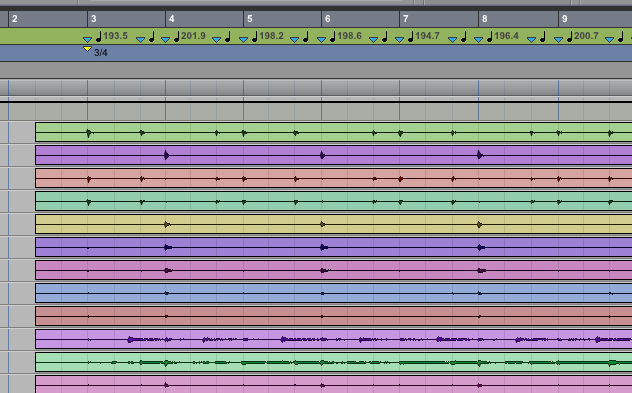
Beat Detective can be used to generate useful tempo maps, even if the original performance wasn’t played to a click.
In the image above, Beat Detective was used to generate Bar and Beat Markers and extrapolate the tempo between them, creating a new tempo map that follows the performance.
This can be done even if a click reference wasn’t used when recording the drums/ Having this tempo map available can be extremely useful, because it facilitates the editing of other tracks, and the use of timed automation and tempo based effects. With our tempo mapped out in this way, there’s no need to tap and program in different delay time settings throughout the song, no matter how often the or dramatically the tempo changes.
In essence, you have made it so that the internal tempo clock of Pro Tools will follow the original performance. This can even be handy in applying new overdubs, as when you now play the native click of Pro Tools, you’ll hear it follow along to the performance making playing along to count-ins and tempo changes even easier.
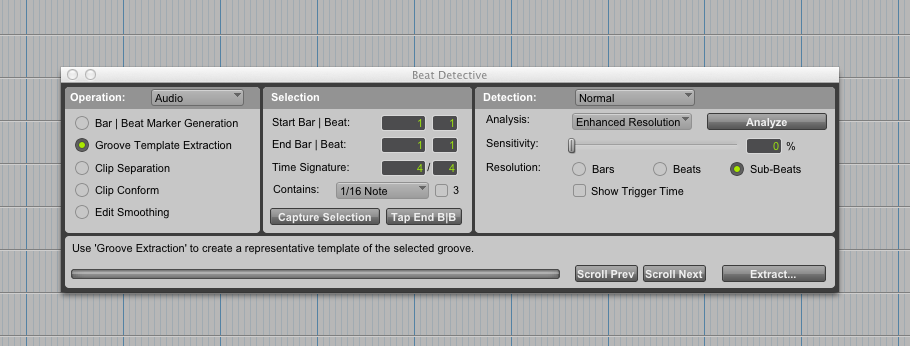
Groove Template Extraction mode.
The second operation mode, “Groove Template Extraction” is similar to the first one, but with an important difference: It allows you to save the timing and groove information of the original performance in a “Groove Template” that you can later apply to other instruments.
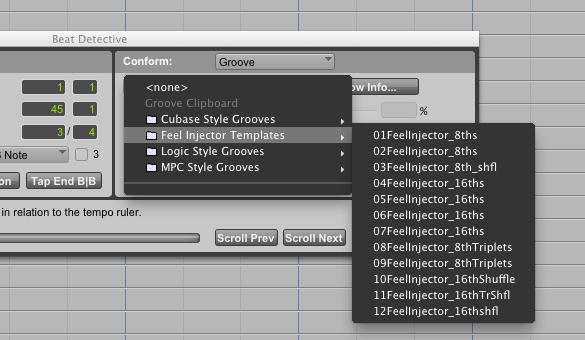
Some of the stock groove templates in Pro Tools.
The two first operating modes are available for both audio and MIDI tracks; the third one “Clip Separation” is available only for audio material.

Clip Separation mode.
Clip Separation is probably the best-known feature of Beat Detective. It allows you to identify transients in the audio material and then slice it at those points.
Once all these hits have been isolated, they can be conformed to the grid—or to a groove template—using the fourth mode: “Clip Conform”.
Lastly, the fifth mode “Edit Smoothing” can be used to “cure” all your edit points, filling in the gaps by creating cross-fades to avoid clicks and pops.
If you feel a little overwhelmed, fear not. Everything will become clearer with a practical case.
In the Field: Editing Drums with Beat Detective
Let’s say we have a multi-track recording of a drum performance with several microphones for kick and snare, plus overhead, room and spot mics. Your recording was done using the internal click in Pro Tools as a reference.
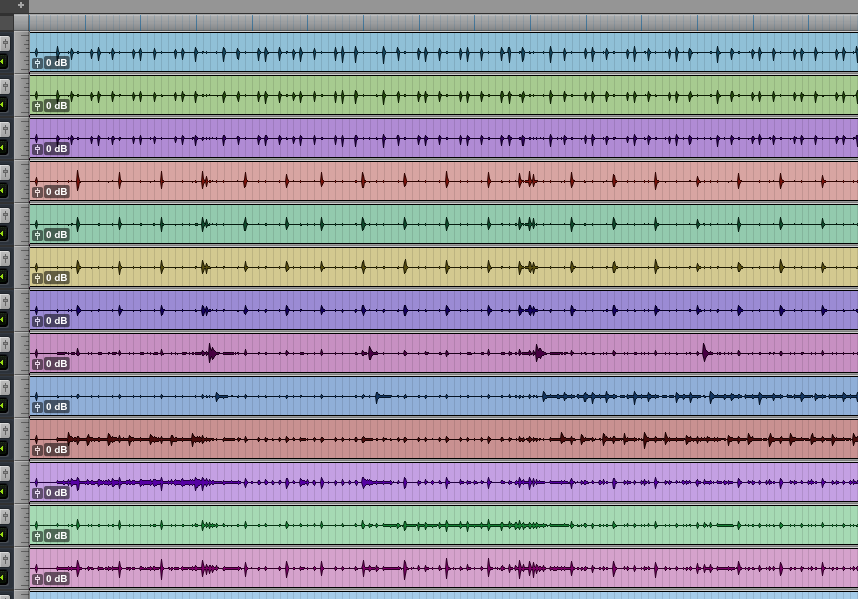
A reasonably solid performance, ready for editing.
The performance is solid, nut we’d like to tighten it a notch to avoid flamming and timing issues when it’s combined with some percussion loops.
It is true that a little touch of Beat Detective can prevent a lot of headaches, but a little too much can do more harm than good. There’s a fine line here between natural, solid groove and an inappropriately robotic one.
Usually, the best way to obtain natural-sounding results is by just editing the bigger subdivisions of the pieces that define the main rhythm (usually kick and snare), letting secondary/grace notes and other elements fall into place.
If you have several microphones for the kick and snare, you’ll get the best results using the “cleaner” and closer microphones to do this—usually “kick in” and “snare top”.
Because we’ll be focusing on these two tracks, it is a good idea to place them next to on another in the edit window:
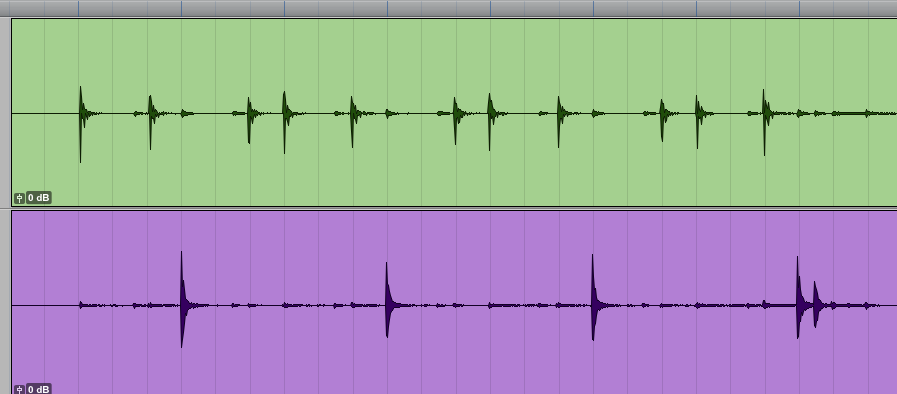
Kick and Snare tracks, side by side.
Now select all the drum tracks and create an edit group (Mac: Cmd+G, Win: Ctrl+G).
Open up Beat Detective (remember, Mac: Cmd+8, Win: Ctrl+8 on the numeric keypad) and make sure the “Clip Separation” mode is selected.
We need to tell Beat Detective which bars to inspect. The easiest way to do this is by highlighting a selection in the timeline and pressing “Capture Selection” to let Beat Detective figure it out.
Although it’s possible to select and analyze multiple tracks at once, the results are often even better when analyzing one track at a time, usually saving time in the long run. Because of this, we’ll do this one the kick track only first, and then the snare.
To make your selection, first press Shift+Cmd+G (Shift+Ctrl+G on Windows) to temporarily suspend all groups. Sure, you could also just suspend the drum group by clicking on it, but the shortcut is a little faster.
Now, place the cursor somewhere before the first kick hit and press “Tab” to move it to the first transient. If you don´t have the “Tab to Transient” option active, you can do so by pressing Cmd+Alt/Option+Tab (Windows: Ctrl+Alt+Tab).
Now, hold the ”Shift” key and use the mouse or the Tab key to highlight your selection. Keep in mind that it’s better to work using whole bar multiples (i.e. four bars instead of three and a half). Now click “Capture Selection” in Beat Detective.
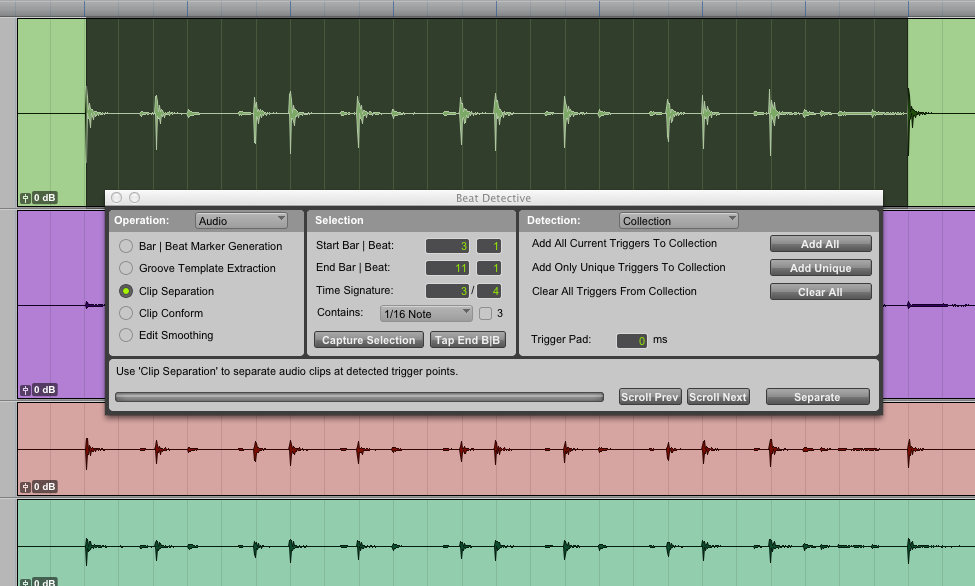
A “captured” selection.
In the example, we made a selection of 8 bars, and Beat Detective filled in the starting/end bars and time signature. The fact that we used the internal click while recording has made this step easier. In other cases, you may need to enter this information by hand.
When starting out with Beat Detective, it is better to work with small selections of, say, 8 or 16 bars. Once you gain experience (and depending on the complexity of the performance) you’ll be able to increase the number of bars you analyze at a time. Sometimes, you can even analyze a whole song in a single pass!
Now that we have our selection identified, we are ready to start the analysis.
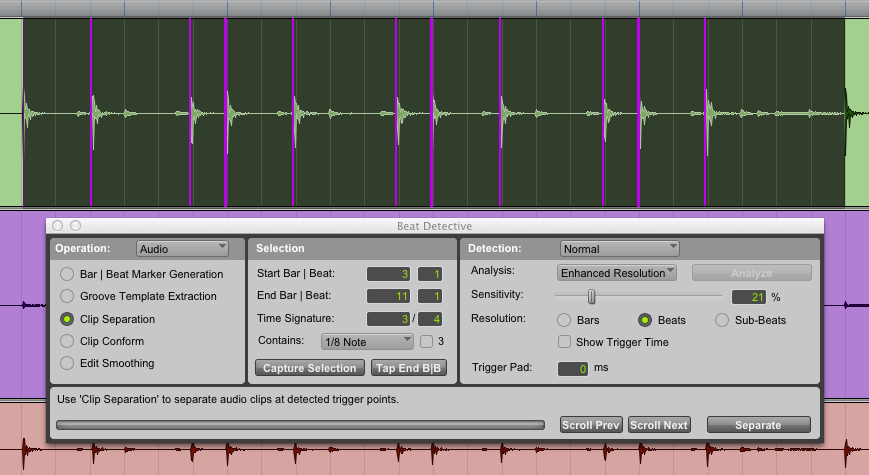
Select the duration of the notes present in the arrangement—here, we’ll go with 1/8 straight notes—and move on to the “Detection” section.
Detecting
We will be using the “Collection Mode” detection, but to do it, we need to start in the “Normal” mode. Select “Detection: Normal”.
(Note for users of Pro Tools 8 and earlier versions: the Collection Mode and multi-track capabilities of Beat Detective were exclusive to HD and Toolkit users before version 9. For version 9 and on, this feature is included right out of the box.)
Under the Analysis menu, you can choose among “High Emphasis”, for analysis of instruments like snare, hi-hat, tambourine and the like; “Low Emphasis”, for instruments with plenty of low-frequency content, like kick, toms or even bass; and “Enhanced Resolution”, a more accurate general-purpose algorithm introduced in version 7.4).
The Enhanced Resolution analysis usually works very well on both kick and snare, but remember the other options are also available, in case you encounter problems when trying to identify the transients on certain instruments.
Now press “Analyze” and move the “Sensitivity” slider until you see vertical markers (called “triggers”) at all of your desired transients. You may have to adjust the resolution—Bars, Beats or Sub-Beats—depending on your material. But remember: in many cases, the less you subdivide, the more natural and human the results will be.
If you need to delete any trigger, you can do so by Alt-Clicking on it with the Grabber or Smart tool.
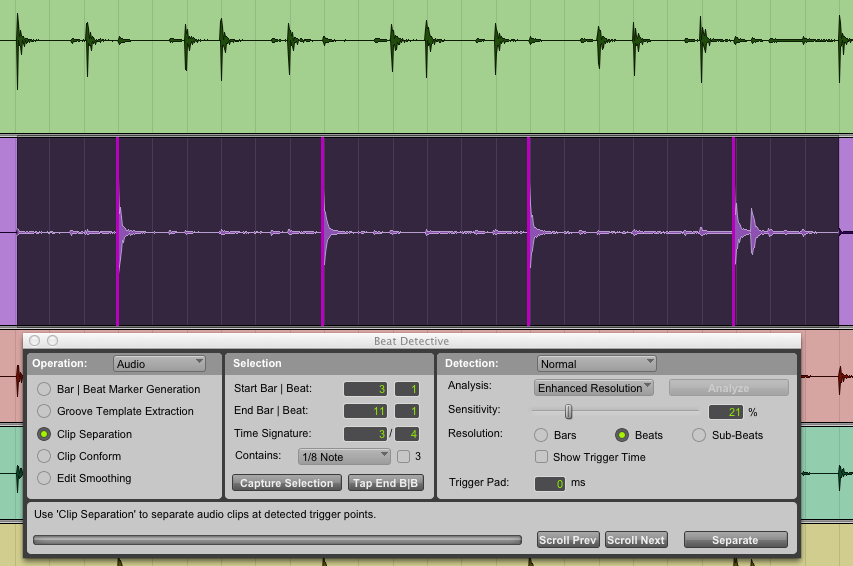
Analysis of the kick drum.
Once you’ve successfully identified all the relevant transients, choose “Collection” in the Detection Mode. All your triggers will disappear, but don’t worry.
We will add now the triggers to our collection. Because we have added no trigger yet, we can press either “Add all” or “Add Unique”. You’ll see the triggers are visible again.
Now, it’s time to analyze the snare track. It is important to maintain your current selection, so you can use Cmd+; to move the selection to the track below, or Cmd+P to move the selection upwards. (Substitute Ctrl for CMB in Windows).
[Note to users with Latin characters: If your keyboard includes the “Ñ” character below the P, the shortcut to slide a selection downwards is Cmd+Ñ.]
When you’ve moved the selection over to the snare track, you’ll see the triggers from the kick track are shown. Don’t worry, this is normal. Go back to “Normal” mode, press Analyze, and readjust the parameters if needed, until you locate all the relevant transients on the snare.
Analysis continues on the snare drum.
CAP: note how only the main snare hits were marked, leaving others unmarked. With time, you’ll develop a sense of which hits to include and which to leave alone. Trial and error is your friend here.
Now, move back to Collection Mode and press “Add unique” to incorporate the new triggers to the collection. By adding unique triggers only, any snare triggers that were in a similar position to your kick triggers will be discarded, and only the new, unique triggers will be added.
You can now re-activate all the groups by hitting Shift+Cmd+G again (or by just reactivating the the Drum group from the bottom-left groups menu) and move your current selection to any of the other nearby drum tracks. This will cause all the tracks in the group become selected, with the triggers from the kick and snare shown over them.
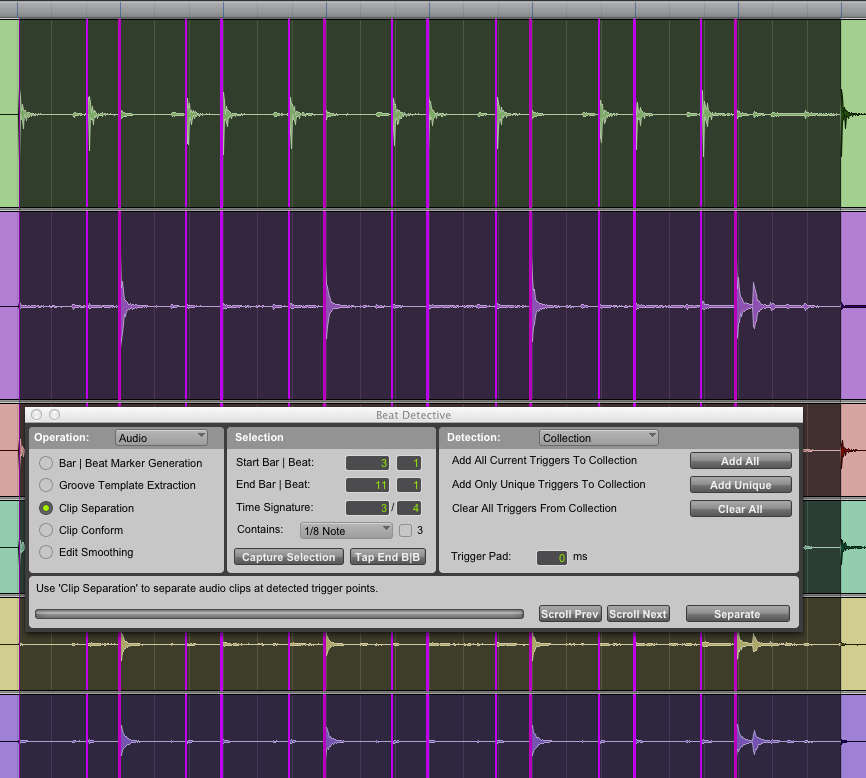
All tracks selected.
Time to slice the pie. Simply click on “Separate” at the bottom right of the Beat Detective window to cut all the tracks at the positions marked by the triggers, and then move over to “Clip Conform” mode.
All sliced up and ready to “conform”!
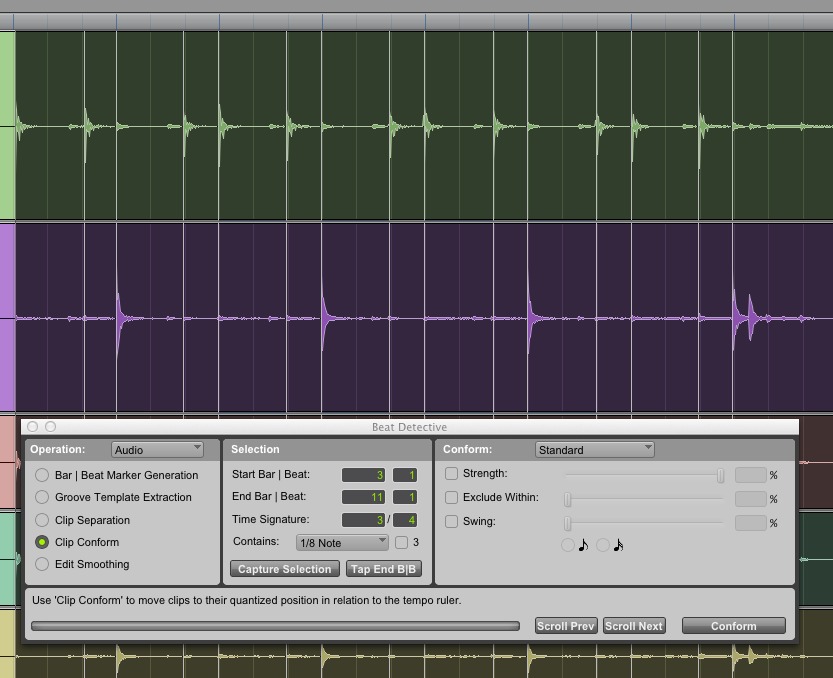
Because we want to conform the clips to the grid, we need to select the “Standard” option under the Conform menu.(Though at this point we could also have applied a groove template to the tracks. More details on that in the next installment.)
Now click “Conform”. Depending on the original performance, you’ll see some regions move noticeably, and others not so much.

The same selection, after the “conform” function is applied. Note the subtle shift to better fit the grid.
Of course, this leaves gaps and overlaps that will cause clicks and pops, but this can be easily fixed using the next mode, “Edit Smoothing”.
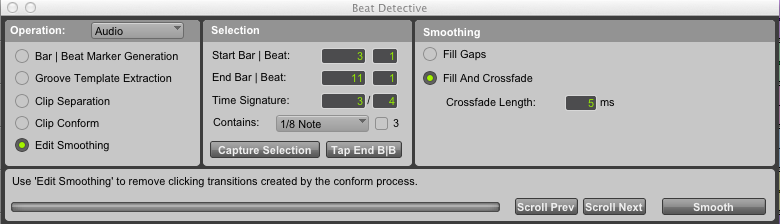
Edit smoothing applies crossfades to the gaps for transparent playback.
Here, select the option “Fill and Crossfade”. Crossfades of 5ms usually work fine, but you may find longer or shorter settings work better depending on the style of playing and performance.
Press “Smooth” to fill the gaps and create all the crossfades. The end result will be something like this:

The final result! A stable, but human-sounding performance, ready to lock in with loops.
The last step is the most important one: Listen to the edited tracks!
You need to make sure all the hits have been moved to the right position, and that there are no audible clicks or artifacts. Sometimes Beat Detective does funny things, especially when small subdivisions are present, and the only way to know for sure is by using your ears.
A visual inspection can also be of help here, but it is important to always listen to the edit, as sometimes a crossfade appears to be OK but, is in fact hiding a small region on one side that can cause an audible click.
And that’s it! You can now continue on to the next set of bars.
End of Chapter
That sums up the first part, an introduction to the most popular use of Beat Detective. If you are new to this tool, there’s a lot of information and techniques to process right there. Try them out and practice! If you follow along to these steps, you’ll see the process speeds up quickly.
Some readers may have noticed we skipped over some options. They’ve been reserved for the second part, on some of the more advanced techniques and strategies. Stay tuned!
Roger Montejano is a producer, mixer and engineer based in Madrid, Spain. He works out of a variety of studios, and offers an online mixing service at rogermontejano.com.
Please note: When you buy products through links on this page, we may earn an affiliate commission.