


The Best Compressor Plugins for Mix Bus (With Audio Examples)
To many of us, the stereo bus compressor has become an important, if not indispensable tool in our mixing workflow. It’s almost as if we can’t truly “complete” a mix until we’ve applied the magic dust that our favorite comp seems to impart.
I am as guilty as any of sometimes relying on stereo bus compression as a crutch of sorts—though the benefits are undeniably real. My use (and love) of a good 2-mix compressor didn’t develop overnight, and in the beginning, it didn’t always seem to help in the way I expected it to.
Over time however, I realized that strapping a good compressor across the main mix provided a bit of sheen that I could not achieve by automating faders alone. It may not be “magic”, but it can be pretty damn cool.
Below, we’ll take a look at a range of some of the best and most popular options available today, to help you hear the differences for yourself and pick your own favorites.
What Makes for a Good Mix Bus Compressor?
The tricky thing about 2-mix compressors (as in with things audio) is that everyone has very specific and often idiosyncratic preferences. These preferences are formed as much by how each of us use the compressor and what kind of impact we expect the compressor to offer to the mix.
Many engineers think of a stereo bus compressor as something that forms a large part of the impact and aggressiveness of the mix, and will set the compressor accordingly, using as much as 4-6dB of gain reduction at all times. Others prefer to just use it for very gentle and transparent level control, while perhaps adding a bit of density to the mix. Both of these approaches are valid, and can yield results that are exciting and effective.
I tend to live in the “gentle and transparent” camp and have always had a hard time really digging way into a main mix compressor without feeling like something is being taken away from the mix. By contrast, I know people who use theirs more aggressively and would argue that hearing it working is the point of using it in the first place. To each his own, right?
Here’s a quick glance at all the compressors in the running. More on each in a moment:


“The Same, But Different”
When I set up this shootout, I had a clear process in mind and was pretty sure I knew what kind of result I would achieve. I have a bunch of 2-mix-worthy comps at my disposal and have used them all at one point or another with some success, so it knew it wouldn’t be hard to clearly show what each one does on the same piece of music.
I painstakingly set up each compressor as identically as possible, with regards to threshold, ratio, and attack and release times. I used a 400Hz tone to make sure they were all nearly identical in terms of gain reduction and output level. I had to ensure that my assessment was as objective as possible so that you could know that I wasn’t just trying to steer you toward what I prefer.
Once I had setup all 11 compressors to a very gentle setting (about 1dB of gain reduction) I was a bit surprised. When they’re barely working, the differences between them all were somewhat insignificant. There were definitely subtle variations in tone, but for the most part it wasn’t black and white, like “this one sounds the best”, or “this one will never work”.
It makes sense that the character of a compressor is defined largely by the sound of its gain reduction scheme and circuit, so naturally, the more you use it, the more it reveals. In essence, a shootout that doesn’t explore a compressor audibly compressing would be of little use to someone who wants to compare the differences between different models and types of compressor.
So, I modified my approach and came up with a better plan:
As an additional test, I figured it would be more useful to try the compressors on a few different types of music and then curate things a little bit by selecting only the ones that performed the best for that specific task.
This was meant to keep you from having to listen through all 11 different samples that are only subtly different while trying to maintain any perspective. It’s hard to hold that many sounds in your head at once, especially when the differences are minute, so that didn’t sound too productive to me. (But for those of you who want to really nerd out, I’ve also attached all the samples for download.)
While I would still test each compressor in the normal (for me), transparent manner, I also did my best to use the compressors in ways that are atypical of my approach, compressing the mix more aggressively. It was eye-opening (ear-opening?) to say the least!
In the end, all of the compressors I tested performed adequately—if not exceptionally—on all of the program material I tested with. But for brevity’s sake it made more sense to focus on the very best performers for each style of music.
The Participants
I have quite a few of these “compressor” things at my disposal, and they represent a pretty good cross-section of what is most commonly used by professionals across many genres. All the major bases are pretty well covered here, including:
![]()
Manley Variable-Mu by Universal Audio – $299.00
This is an emulation of the famous all-tube compressor by Manley which employs the same gain-reduction method as a Fairchild 670.
It has a 1.5:1 ratio in “compress” mode and goes from 4:1 to 20:1 in limit mode, depending on the amount of gain reduction applied.
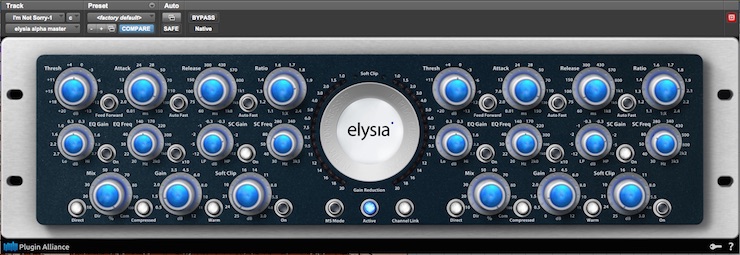
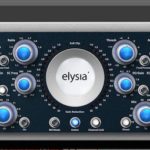 Elysia Alpha Master by Plugin Alliance (also available for UAD) – $299.00
This is an emulation of the Elysia mastering compressor, renowned for its ultra-high-quality Class A signal path and gain reduction circuit. It can operate in Feedback or Feed-Forward modes which makes it extremely versatile.
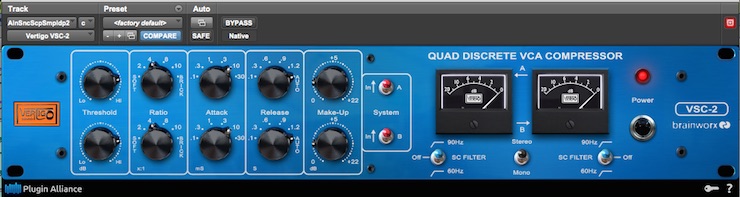
 Brainworx Vertigo VSC-2 by Plugin Alliance – $299.00
This is an emulation of the Vertigo VSC-2 VCA based compressor.
It’s much like a classic SSL buss compressor with a couple more ratio settings and an all-discrete, mastering-grade signal path.
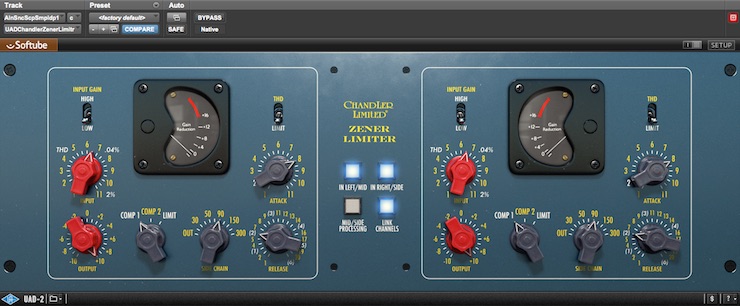
 Chandler Limited Zener Limiter by Softube (also available for UAD) – $299.00
This is an emulation of the Chandler version of the Abbey Road/EMI limiters from the late 60’s and early 70’s, with a very colored, but musical, signal path.
The plugin version has been adapted and updated from the original designs to make it more versatile, consistently useful and modern.
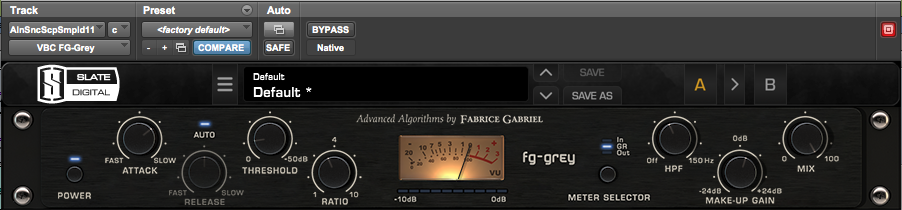
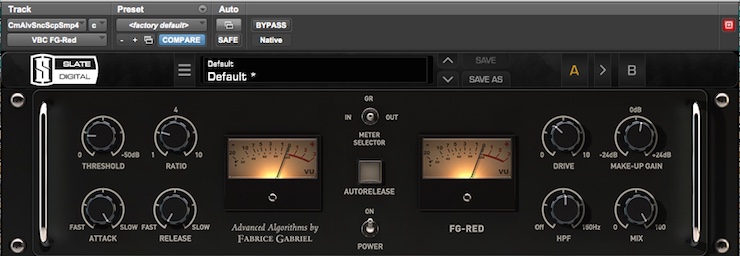
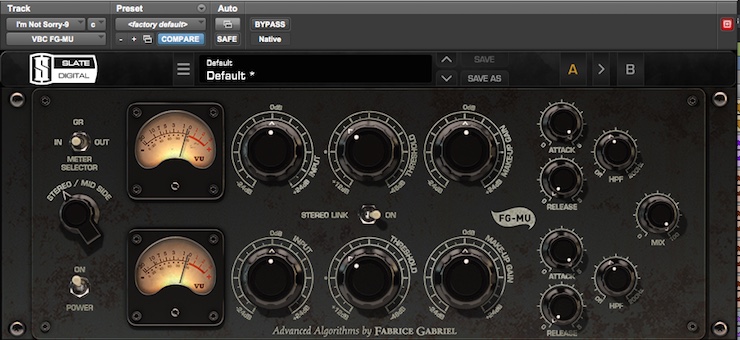
 Virtual Buss Compressors by Slate Digital – $149.00
This is a bundle of popular buss compressors offered by Slate Digital that includes three distinct models, each with a different tone:
The FG Red is modeled after the transparent Focusrite Red compressor, with a few added features. The FG Mu is modeled after the Fairchild 670 and adds some more versatility with fully variable attack and release times. The FG Grey is modeled after the classic SSL 4000 buss compressor.
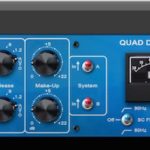
 Shadow Hills Mastering Compressor by Universal Audio – $299.00
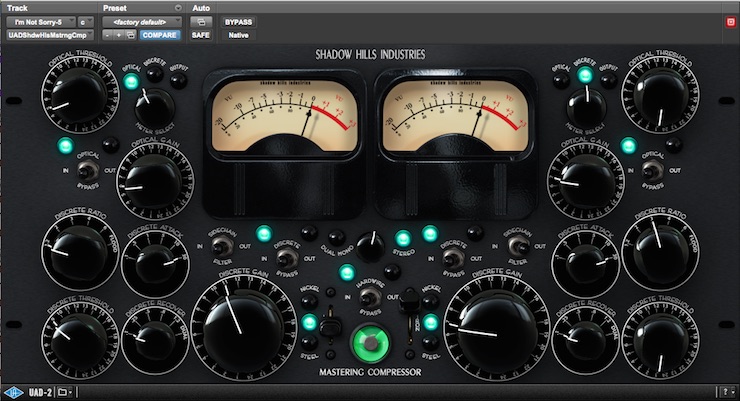
This beast of a plugin is based on a beast of a hardware unit that carries the same name. It is comprised of an optical compressor and a VCA compressor in series.
In addition to these two stages of compression, it has three switchable output transformers—”Nickel”, “Iron” and “Steel”—and a built-in sidechain filter.
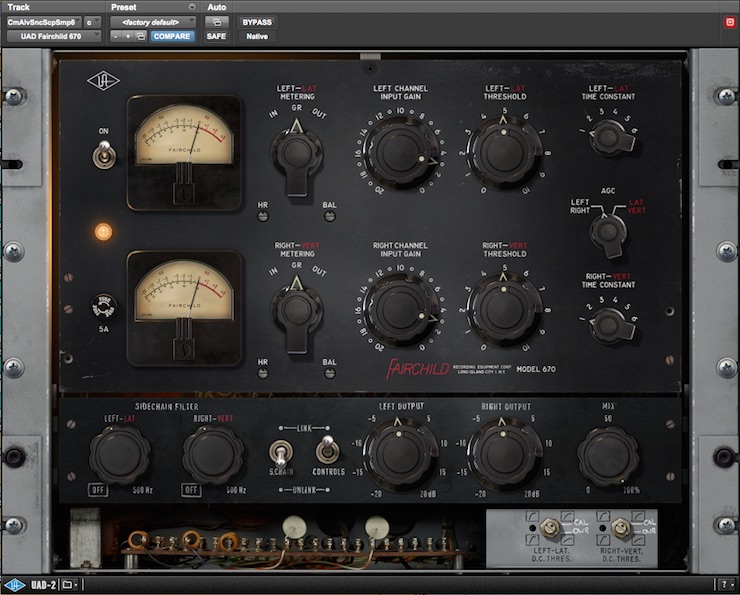
 Fairchild Tube Limiter Collection by Universal Audio – $299.00

This emulation was an update of the already great Fairchild 670 from UAD.
In this bundle, they added new features like a variable sidechain filter and a headroom control trimmer, while retaining the legendary Fairchild tone.
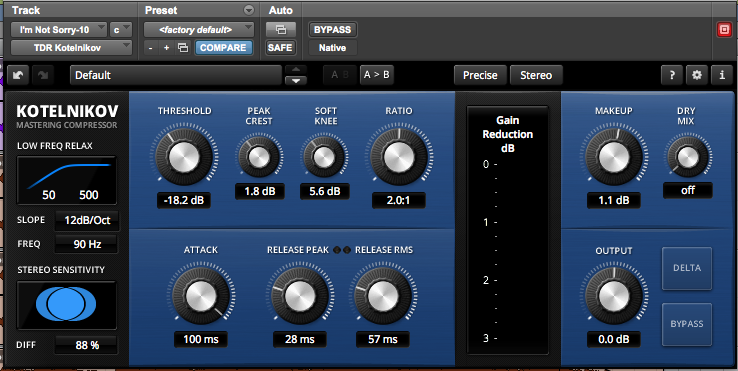
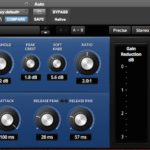 Kotelnikov Mastering Compressor by Tokyo Dawn Labs – Free!
This is a remarkably transparent compressor that models nothing in the real world, and is free.
The “Gentleman’s Version” is €40 and adds a few useful features like an external sidechain, “insane quality” mode and equal loudness bypass and more.
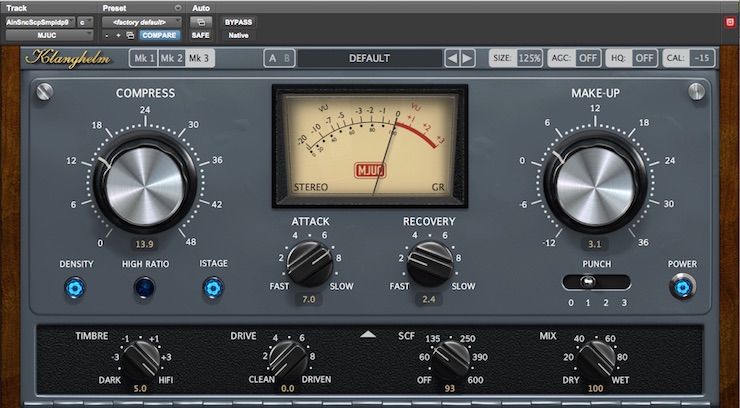
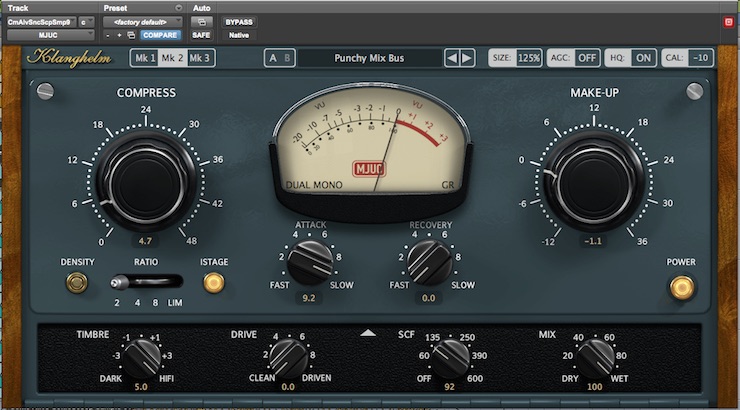
 MJUC by Klanghelm – $25.50
This incredibly affordable software compressor from Klanghelm includes 3 separate and distinct models:
The Mk1 is a model of the Fairchild 670 with a few unique features added. The Mk2 models the UREI 175 or 176, also with a few unique features added. The Mk3 is Klanghelm’s proprietary take on vari-mu compression with a more modern twist.
Test A: Transparent Level Control
I started with the mode that was most comfortable for me, which is where the compressor is barely working.
When used this way, I rely on compressors that have a clean signal path and a transparent way of controlling the mix that is subtle yet effective. For the most part, I am using a low ratio of 2:1, or less if available.
I find that tube compressors are usually better for this task, simply because of the gentle rounding of transients that occurs when you drive a tube circuit even slightly. This tube “shaping” works like having an almost-invisible compressor in front of your compressor. It’s similar to the way that tape can add RMS level to your mix without apparently changing the mix. (Though of course, it is changing it.)
For the first test, I used a song from The March Divide, with whom I just completed a record. It’s acoustically-driven, singer/songwriter type of music, which is dynamic and clear, with lots of acoustic percussion. The song is called “I’m Not Sorry” and you can check out the band at their website, themarchdivide.com. This record is slated for release sometime in mid-2017.
On this song, I was careful to not clamp down much at all on the loud parts, particularly because the verses are quieter, and I still want the chorus to “lift”. Too much compression would have the reverse effect.
For the most part, during the loudest section of the song (in this case the chorus) I am only compressing about 1dB, with an occasional bump to 1.5dB. Subsequently, the verses are barely compressed at all.
Here are the standout performers of this test, in my personal order of preference. (You can also click here to download the full resolution files.)
Elysia Alpha Master (A1)
This one sounded stiffer and more high-fi than the others—though not by a lot. Since I’m only compressing slightly, it was more about the clean signal path than the sound of the gain reduction circuit. The mix seemed slightly clearer with this compressor, which allowed me to hear more detail within the stereo image, specifically on the percussion.
Shadow Hills Mastering Compressor (A2)
This compressor seemed a bit thicker and slightly more forward-sounding. This could be attributed to the output transformer I selected (“Iron”) and the fact that there are actually two compressors running in series here. Even though neither gain reduction meter was moving much, the mild compression was still pushing things together nicely.
Manley Variable Mu Compressor (A3)
This one sat somewhere between the previous two, with a slightly creamier sound and a smoothness to the high end compared to the Alpha Master; but it was perhaps a bit less thick than the Shadow Hills. It had a nice “glue” to it as well, which is probably attributed to the numerous tubes in the signal path it recreates to convincingly.
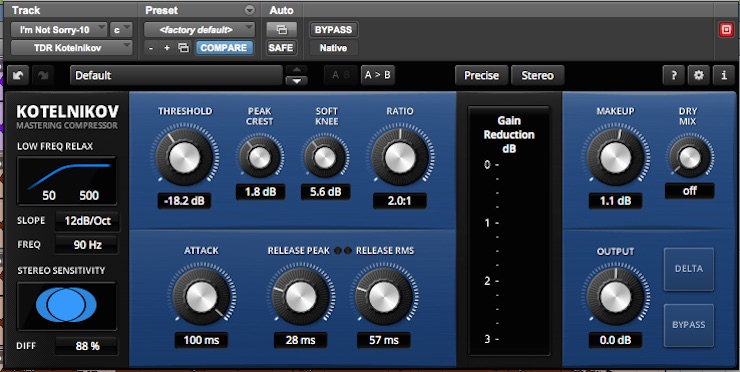
Kotelnikov Mastering Compressor (A4)
This was the most transparent of them all, seeming not to add any color to the mix, while lightly touching the loudest hits. Because there is both a “peak crest” and a “soft knee” adjustment, it was quite easy to optimize it for a kind of dual operation. Without the gain reduction meter, I’m not sure that I would have noticed it working at all.
[If you want to go deeper and hear the runners-up in this category, you can download them here.]
Test B: Heavier Song But Light Compression
This test was probably more indicative of how I would go about processing something that is hard-hitting and aggressive. While the compression can help add some color to the tone of the mix and keep things “glued”, I’m still just looking for a little bit of general level control and averaging. In other words, this is not overly-squeezed at all.
In these samples, the compressors were each applying about 1-2dB of gain reduction most of the time. To my ear, this is a fair amount of compression and is quite noticeable compared to the un-compressed mix. Even still, I set them up to add something musically beneficial, and in all instances, the compressed mix was subjectively better than the unprocessed mix.
The song for this sample is from a band called New Language. I mixed and mastered the record Come Alive for them late last year. This song is the title track from that record and is heavily guitar-driven rock with big drums and bass to go along with it. You can hear more of their music and download the record for free by going to their website: newlanguageband.com
Here are the standouts again, presented in my order of personal preference. (You can also click here to download the full resolution files.)
Universal Audio Fairchild 670 (B1)
The Fairchild 670 really seemed to help this mix “come alive” (pun intended) by accentuating the aggressiveness of the band and their playing.
Instead of compressing more by lowering the threshold, I drove the input of the Fairchild slightly harder for some slight rounding of the transients, while still keeping them mostly intact.
The hint of added distortion that this technique gives the track made it sound more intense and muscular. This one felt “loud” regardless of how loud I was actually listening.
Brainworx Vertigo VSC-2 (B2)
The VSC-2 was brighter than the Fairchild and somewhat cleaner as well. It seemed to accentuate the kick and snare transients nicely.
Some of this can be attributed to the availability of a slower attack time than the Fairchild has, but is also due to the sound of the VCA gain reduction circuit.
Instead of pushing everything together the way the Fairchild did, it spread things out nicely making the mix seem wider and clearer. This has the hallmarks of what most people love about the SSL buss compressor, albeit in a much cleaner, more hi-fi way.
Manley Variable Mu Compressor (B3)
The Manley shows up again…not surprisingly. This one made the mix a little bit smoother but also kept the thickness that the Fairchild added so easily.
Using the slowest attack time available kept the transients intact while the slight drive on the tubes made it fuller and polished sounding. Using the sidechain filter also helped keep the big hits “big”.
Klanghelm MJUC (B4)
This one is the most colored sounding compressor of the bunch by a long shot, but it adds some low end girth that is remarkable. I used it in “Mk 2” mode, which is a model of the UREI 176. It made everything seem bigger and deeper even while only gently compressing things.
I don’t really trust the gain reduction meter because it wasn’t moving, but there was definitely some compression being applied. No matter; it really added something that I don’t even think could be achieved if you paired a compressor with a good EQ. There’s nothing transparent about this compressor, but when it’s right, it’s hard to beat.
[If you want to hear the runners-up in this category, you can download them here.]
Test C: Heavier Song With Aggressive Compression
For this third and final test, I went much further into the compressors and made them work a little bit. I think there are enough people that work this way and are looking for compressors that work well with that approach, so I set the compressors accordingly.
For the most part, I went with medium to slow attack times and medium release times; unless there was an auto release function, which I opted for instead. I also set the ratios a bit higher at 4:1 instead of the moderate 2:1 ratio as I had used before.
With high-density, hard-hitting tracks, the compression can be noticeable—and not always desirably so—so getting the release right was paramount. Oftentimes the auto release function allowed me to keep compressing 3-5dB without audible pumping or breathing.
(Since this mix was already done, I was unable to manipulate the mix to accommodate some of the compression changes. Were I mixing the song while applying compression, I could use more athletic automation moves to make things behave more predictably.)
For this test I used a song from a band from Germany called Nissefort for whom I mixed their upcoming record. The song is called “Alone” and will be available when they release the record sometime in 2017. You can go to their Facebook page to connect with them: https://www.facebook.com/
This song is also aggressive with tons of guitar, bass and drums, all fighting for space with the vocal. I thought that this type of song was more suited to be compressed more, without suffering some of the pitfalls of over-compression that occur on more dynamic songs.
Once again, in my own order of preference. (And you can click here to download the full resolution files.):
Brainworx Vertigo VSC-2 (C1)
Once again the VSC-2 works well on loud, aggressive music. It does some cool and noticeable things to the sound of the drum transients and seems to pull the guitars a bit forward while smoothing them out. It doesn’t appreciably soften the sound of anything either.
While I can clearly hear it working, it does add a cool sense of movement and excitement that really works on a track like this one. The use of the auto release function allows the compressor to be more agile in following the changing dynamics in the louder section.
Slate Digital-FG Grey (C2)
It’s no surprise that another SSL buss compressor was close behind the Vertigo. These sound pretty similar, though the Slate is not quite as open sounding on the top end. I also found that the Slate seemed better if I drove it a little further into compression than the Vertigo. Once again, I used the auto release function and this one felt pretty full and in-your-face.
Klanghelm MJUC Mk3 (C3)
This is technically a Variable Mu type compressor but it has characteristics that seem more like the SSL comp than the other vari-mu models in this compressor. Once again, it added a ton of low end thickness which made the track have an air of authority and power.
Chandler Limited Zener Limiter (C4)
This limiter sounded cool, but it took a bit more manipulation of the track to make it do what I wanted. The Zener Limiter has an unusual gain structure, and when compressing complex material like a full-on rock mix, it’s not always easy to keep it out of compression without turning something down in front of the limiter. Additionally, it’s not always easy to make up the lost gain after you trim it back to get the compressor to behave as you want. It’s a very aggressive and colored sounding compressor, so when it kicks in, it’s not subtle!
In order to get it inline with the other tracks and to make the compression work the way I needed it to, I had to turn down the front end of the track so it still hit hard on the loud part (see image 13). This is not a big deal when you’re mixing because you can account for this, but in this instance it was worth noting what needed to happen to make a true “apples to apples” comparison.
Despite all of that, the compression sounded so cool when the track got loud that I felt it had to be included. It’s not transparent or subtle but it does have a ton of character that many may find appealing.
[Once again, if you want to go deeper and hear the runners-up in this category, you can download them here. To see the exact settings used in any of these tests, click here.]
A Few Observations
Whenever I write an article or do a review of something, my main goal is to offer you, the reader, some perspective and information that you may not be able to find anywhere else. At the same time, I also hope that my own perspective will be given a shakeup that will force me to reexamine what I do and how I do it, so I can improve the quality of my work.
When it comes to 2-mix compressors, I have always been a bit old school, meaning that the compressor is there to enhance the sound of the mix but is not the thing that the mix lives or dies by. In the last 10-15 years however (and in some cases earlier) the 2-mix compressor has become elemental to the work of so many top-flight mixers that it was worth exploring what a more heavy-handed approach can bring to a mix. I can’t say that I would necessarily change the way I go about compressing the mix all the time, but I do see the appeal of the sound that it can create.
This experiment also made me realize that it would take a change in my mixing process if I chose to adopt a more aggressive style of compression on the 2-mix.
When I’m mixing, I work on my different instruments (drums, bass, guitars, keys, vocals, etc.), and then I work on the balance between them. After that, I work on different sections from loud to quiet to make the balances work, and to make sure that the transitions are smooth and musical.
Once that’s sorted out, I work to make certain that the static mix (before automation) is solid and works well without much further manipulation. Once everything has been accounted for, then I insert the 2-mix compressor on the stereo buss. At this point it is simply adding glue and enhancing the tone. I will then follow with automation to make the mix interesting and to make the compression work even better while accounting for the changes that the compressor may have caused.
By contrast, when I’ve worked with people who use a stereo bus compressor more aggressively, they tend to start the mix with the compressor inline. This way, every decision they make directly affects what happens when it hits the compressor, and they build the mix to deal with that.
On one hand it seems backwards to fight something from the beginning. But on the other hand, if you prefer the sound you can ultimately achieve by using more aggressive bus compression, then why not leave it in and deal with the issues that arise, as they arise? That way, you can hear the way the compressor reacts to your changes in real times, and adjust accordingly.
There is no “one way” to mix, that’s for sure. If you give 10 mixers the same tracks you will get 10 completely different mixes. But acknowledging that you probably have a specific way of doing things may cause you to change it up a bit and see if a new approach is better…or just different. I hope that some of these observations will inspire you to take a step back from how you mix and see if a different approach can jump-start your mixes.
Mike Major is a Mixer/Producer/Recording and Mastering engineer from Dunedin, FL.
He has worked with At The Drive-In, Coheed and Cambria, Sparta, Gone is Gone, As Tall as Lions, and hundreds of other artists over the last 30 years.
Major is the author of the book Recording Drums: The Complete Guide . Try his new premium course, Mixing Drums: The Method to the Mix. Try it today at MixingDrums.com.
For more great insights into both mixing and mastering, try our full-length courses with SonicScoop editor Justin Colletti, Mixing Breakthroughs and Mastering Demystified.
Please note: When you buy products through links on this page, we may earn an affiliate commission.
George Piazza
May 4, 2017 at 5:36 pm (7 years ago)I have most of these compressors in my arsenal (Manley, Vertigo, Alpha, Fairchild, Shadow Hills, Kotelinkov), and a few others that I think are nice.
I’ve had somewhat similar experiences with Mike Major, with slight exceptions.
The Manley is nice for less aggressive music. It doesn’t always provide the thickness one might want with heavy rock mixes (though it can be a great group buss compressor before the main compressor). The tube sheen is excellent, complimenting the high end nicely. In 1:5 mode, it is really designed to be hit rather hard, as the compressor gives up after @ 10 dB, which lets drum transient through while retaining thickness.
The Shadow Hills either works or it doesn’t. I think the mix has a lot to do with this, especially given the two compressors in this beasty (though you can use only one if you want). It also often makes a great group compressor, especially in situations where the transformer selection adds to the sound – like acoustic & electric guitars, bass, etc.).
I almost never use the Fairchild as a mix bus compressor; it’s fast attack time and heavy coloration rarely works for any of my mixes. It is occasionally the perfect track or group buss compressor though.
The Slate lineup is odd. Every now & then one of them works (usually the Grey – SSL or the Red – Focusrite); the mix knob can really help retain some of the ‘clean’ sound, though I’ve noticed phasing problems with earlier versions (Slate may have fixed this by now). I do not find the distortion on the Mu very convincing; it sounds a little cheap to me.
The Elysia Alpha Compressor is a kind of ‘desert island’ choice for me. It is so flexible, it can deal with numerous needs, especially with it’s feedback / feed forward selection, auto attack & auto release, mix feature and mid-side mode. Not a lot of coloration per se (unless you use the peak limiter function), but for thickening up & widening, it does the job.
The Vertigo is very nice; the gain knob adds a subtle grit; it has all the settings of an SSL, but sound better than wither the UAD or Wave SSL Buss Compressor. It is not always the right tool for the job, but it is right there with the Alpha & Manley. The auto release is excellent. I could live with these three if necessary.
I have also successfully used the UAD Neve 33609, the PSP MasterComp and/or Vintage Warmer, the Voxengo Polysquasher and the Sonnox Compressor (+ gate / expander / warmth / sidechain).
The free guy – Kotelnikov – is very clean & flexible; well worth the download.
Izotope’s Ozone has improved over the years, but it is a bit of a beast to deal with; besides, multiband is not the topic here.
My favorite secret weapon for the main buss is the DGM Essence. It is not only an excellent mastering De-Esser; it also does various parallel compression tasks better than anything else I have tried. I can always dig out 2 – 5 more dB with a mix and still sound transparent with it. It includes excellent presets by Bob Katz for various parallel compression needs, including bass, mid or treble thickening (tonal parallel compression) and an excellent starting point for the transparent parallel job. A real hidden gem!
Justin C.
May 4, 2017 at 5:44 pm (7 years ago)Thanks for sharing this take George! Glad to have read it. I’ll have to check out the DGM Essence. Not too familiar with it yet myself.
Mike Major
May 4, 2017 at 5:51 pm (7 years ago)I’ve never tried the DGM. Now you’ve piqued my interest, damn it…
You’re not helping!
Eddie TX
May 5, 2017 at 1:31 am (7 years ago)Great work putting this shootout together! Thank you for doing it.
Was wondering if you’ve tried the new API 2500 from UAD (I assume you’ve tried the Waves version) — it’s really something.
Also, there are very interesting things coming out of Acustica Audio (of Nebula fame) lately. Their Coral, Lime, and Sand compressors are among the most hardware-like plugins I’ve ever used. If you can figure out their demo procedure, they’re well worth checking out.
jes
May 5, 2017 at 5:51 am (7 years ago)This was a great article, thank you!
I use mostly UA (I mean a *lot* of UA, and almost always in Pro Tools, FWIW) and seem to change up that 2-bus compression almost per project, but I have to say I do like the Shadow Hills. In your example A test, one thing I also hear also is more of the ambience in A2 with the Shadow Hills that I don’t hear in the others.
Mike Major
May 5, 2017 at 11:46 am (7 years ago)Thanks Eddie! Glad you liked the article. It was quite a bit of work to put it together but I learned a few things along the way, which I didn’t expect.
I have tried the UAD API 2500. I was going to include it in the shootout but just couldn’t make it do anything that I liked, so I left it out. I had so many others to choose from (probably too many) that I felt it wasn’t necessary to include. Now having said that, it may work well for some folks and I know that some engineers love it and swear by it. Just not my taste, I guess.
I haven’t seen the Acustica stuff yet, so I guess I have to go check that out now.
Mike Major
May 5, 2017 at 11:56 am (7 years ago)Thanks Jes! Glad you liked it.
The ambience difference you hear probably has to do with the interaction between release times of the optical comp and the VCA comp. Since they’re different and the gain reduction circuits respond differently to the transients, it must have seemingly extended the decay of a reverb and brought it forward, thus making it more apparent. At least, that’s what I think is happening…
I probably use the Shadow Hills more than anything, even with all of the choices I have. The combination of the two comps in series is pretty powerful and usually transparent. Plus, being able to change the output transformer can really affect the tone of the whole mix positively. Sometimes it just doesn’t do the trick, so I look elsewhere, but more often than not it works perfectly.
I find that the choices available are more fully exercised when I’m mastering because the different comps offer more tools with which to shape things. When I’m mixing or mastering my own stuff I don’t need as much variety because I have a way of putting the mix together that is well planned before I ever insert the two mix comp; in other words, it doesn’t make as big a difference overall for me personally. But now and then, something weird ends up on the 2-mix!
Eddie TX
May 5, 2017 at 12:53 pm (7 years ago)Cool, Mike. Thanks for the reply. Yes, the API doesn’t work on everything, but when it does …
Acustica has some unique tech and it’s finally coming to fruition in the form of usable plugins. They do have some work to do on the whole customer experience — it’s a pain just to download and authorize a demo — but wow, the sound. Hit me up if you have any questions about getting set up with those. Thanks again for the shootout!
Mike Major
May 5, 2017 at 1:00 pm (7 years ago)Yeah, the API was a head-scratcher for me, honestly. I have tried it a dozen times and can’t ever get to the point that I’m like “OK! That’s it!”. I know some people love it.
Since you posted this I looked at the Acustica stuff and it looks really intriguing. Lots of cool things that appear to be based in reality but with a twist. I will be trying the some demos here soon. Thanks for the tip!
Adrian
May 5, 2017 at 1:28 pm (7 years ago)These differences are incredibly marginal. Not worth the headache.
Mike Major
May 5, 2017 at 7:43 pm (7 years ago)Hi Adrian. Are you listening on a good set of monitors or high quality headphones? The differences are pretty significant in some of the samples. I agree that when they’re not driven too hard they are more similar, but the differences in tone and dynamics control should be noticeable.
denis la malice
May 6, 2017 at 2:34 am (7 years ago)I must say this like this : this shoutout makes very little sense since the way you mix one song will be influences by the comp you will use as 2buss, so it is much more like some mastering comp shoutout and even that is flawed since some will react better one one type of mix than one other.
Experience with working with one typical pluggin will dictate your choice, not a shoutout.
Personal taste also : for instance, I’m not big with the vari-mu as buss compressor, I doubt I would chose the pluggin for that matter, I base this choice on many attempts.
I always used the SSL buss (not big with any pluggin versions) and loved it : but it is not a transparent one at all, so it might have sounded terrible in this shoutout, but have you “mixed” the track in it at the beguining of your test, it might have ended with the best results.
denis la malice
May 6, 2017 at 2:35 am (7 years ago)Now that said, out of experience (not this shoutout), I like the Shadow Hill quite a bit. 🙂
Greg Strickland
May 6, 2017 at 10:27 am (7 years ago)Perhaps no mix buss compression is best. Particularly for a radio mix or any mix likely to receive audio processing downstream. Should you presume your mix sound is the sound heard by the entire audience?
Mike Major
May 6, 2017 at 12:43 pm (7 years ago)Sometimes that’s true, but I like what a comp does to the sound of the mix. I am always cognizant of how things will inevitably change downstream (mastering, radio, iTunes, etc.) and try to mix in a way that minimizes the differences between all of the delivery media. But ultimately, I just like how using a comp makes things feel more together and complete. Also, if I control the way the dynamics are presented then I’m less likely to be surprised by how some downstream process affects them. I can remember some stuff I mixed way back when that really sounded strange on the radio. There’s ways to fix that and compression is one of them.
Mike Major
May 6, 2017 at 12:57 pm (7 years ago)Well, honestly, the whole purpose of a shootout is to directly compare the way the different options perform under the same conditions. Otherwise there’s no reference point. Without a reference point then it’s not an apples to apples comparison.
If I stand in front of a mirror and try on 5 shirts then I know exactly what those shirts look like on me at that point and in that lighting. Knowing this I can then decide which one I would wear to go the movies, which one would be best for a job interview, which one makes me look fat, etc.
Likewise, I can compare how each of these comps react to the same music, with basically the same settings, and then extrapolate how that would work in other situations that I may need to use a compressor. It’s like any audio gear that we ever hear: you listen, make a judgment and then file it away in the memory banks for later recall: “that would work great on this type of mix”, or something like that.
Not everyone has experience with all of these compressors, so I am offering a direct comparison under specific conditions so they can hear what is different and what is the same, that’s all. It’s somewhat subjective because I had to set the compressors, but I also tried to be as scientific about the process as I was able to do and still fulfill the goal of the shootout-which is to show how a bunch of different compressors sound on a mix.
And trying to mix a song for each compressor would have taken a month and would tell the reader nothing useful except that I could use a different compressor on a bunch of different mixes. That’s not illustrative in any way.
denis la malice
May 7, 2017 at 11:58 am (7 years ago)I agree with you mostly. I just wanted to point the limitations of this particular shoutout . best regards
Ray Tubes
May 11, 2017 at 8:23 pm (7 years ago)I like the Alpha’s transient punch.
The kick is tight, solid, while retaining good bottom end and the guitars are nice and spanky.
The image is quite wide, and it is interesting how the triangle is much more forward than the Shadow Hills.
Shadow Hills has a nice overall balance, sounds a bit wider than the Alpha, good transient response though less in your face feeling.
I suspect this is the Steel trafo setting as opposed to the Nickel and feel the Nickel would sound more forward.
As for folks not mixing into a 2 Bus comp, many of is do even if the mix goes out uncompressed.
The balance of the mix and EQ tends to be different when mixing into compression and this can be a great way to have a more polished mix for your mastering engineer to work with.
WayneD
June 3, 2017 at 4:19 am (7 years ago)Brilliant thanks so much for getting this together esp supplying files. Very helpful.
Null Static Void
June 21, 2017 at 5:46 pm (7 years ago)Guess I’m a little late to the party.
Surprised you skipped over the other UAD offerings. I’ve used their 1176 and LA2A plugins for 2 buss for years. The 1176 is tricky, but it sounds right on certain mixes.
The Neve 33069 though seems perfect for the job. It can do overdriven, or clean and is quite adept at making just about anything sound 110% thicker.
I could name a bunch of other UAD plugins, and that is kind of the thing. You could easily write a whole article on just UAD 2 buss plugins.
btw, I always throw an EQ on there too.
Steven Adams
September 7, 2017 at 11:47 am (7 years ago)sknote’s SDC is a fantastic emulation of the Shadow Hills!
Marcus Mittilä
November 18, 2017 at 5:18 am (6 years ago)This was a great read, interesting comparisons! Thank you!
Dangenoir
December 15, 2017 at 10:53 am (6 years ago)Wow !
I found the complete biaised, zero level matching, inconsistent, subjective, alleatory ; and since you a priori knew that all along by pre-retracting in the “The Same, But Different” paragraph!
Still you took the ‘grand-risque’ of posting it, while it could only be a failing (Shootout) with the impossibility of objectively hearing anything but three 30 seconds clips, that gave us the chance to perhaps discover new bands with different compressors applied to them. Sadly, all uncompressed clips sounded more balanced, with more definition and…….more dynamic !
Thank you for your courage, and for having sharing links for all bands (it was a nice touch) 😉
SonicScoop.com is one of these rare web area where you can actually REALLY LEARN, mostly knowledgeable Audio-Engineering vitalizing tips, tricks, hints, concepts, ideas and Spooks ? As a DSM-V (musical edition) !
Avila Marcos
January 5, 2018 at 1:18 am (6 years ago)For me Manley Variable Mu Compressor keeps winning in my daw, i use it track by track and on the mixbus, gotta love the fairchild as well
Avila Marcos
January 5, 2018 at 1:19 am (6 years ago)indeed
Paul
January 8, 2018 at 2:12 am (6 years ago)Would have liked to hear some jazz or soul/blues. The acoustic pop wasn’t a good indication for me.
Richard Domina
January 11, 2018 at 11:59 am (6 years ago)Hi Mike and thanks for this shootout. Have you taken a listen to Acustica Audios ‘Ultramarine’ 670? Curious.
Mike Major
February 5, 2018 at 5:22 pm (6 years ago)Hi Richard. Sorry I didn’t see this message. Glad you liked the shootout. It was a lot of work to put together!
I have not tried the Acustica Ultramarine, no. I have limited experience with their stuff but I’m pretty impressed thus far. I may get a few of their plugins to try for some future shootouts because they look like they offer some interesting stuff. I would guess that their 670 is much like the UAD Fairchild (which is the best one I’ve heard) but I won’t know until I try, right?
Richard Domina
February 5, 2018 at 10:08 pm (6 years ago)This is what I ended up getting and it’s quite nice (http://www.sknoteaudio.com/wp/index.php/2016/01/11/sdc-stereo-double-compressor/)
. I’d love your take on it so i look forward to the next shootout. Thank you!!!